LESS - 安装
在本章中,我们将逐步了解如何安装 LESS。
LESS 的系统要求
操作系统 − 跨平台
浏览器支持 − IE (Internet Explorer 8+)、Firefox、Google Chrome、Safari。
LESS 的安装
现在让我们了解 LESS 的安装。
步骤 1 − 我们需要 NodeJs 来运行 LESS 示例。要下载 NodeJs,请打开链接 https://nodejs.org/en/,您将看到如下所示的屏幕 −
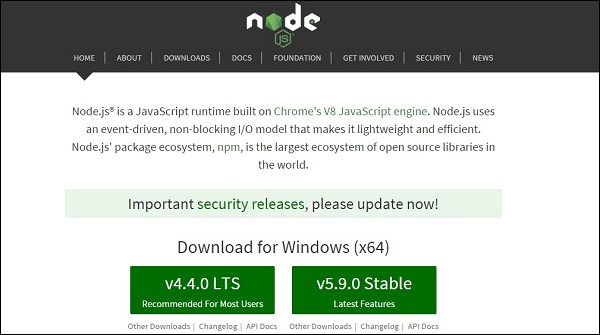
下载 Latest Features 版本的 zip 文件。
步骤 2 − 运行安装程序以在您的系统上安装 Node.js。
步骤 3 − 接下来,通过 NPM(Node 包管理器)在服务器上安装 LESS。在命令提示符中运行以下命令。
npm install -g less
第 4 步 − 成功安装 LESS 后,您将在命令提示符中看到以下几行 −
`-- less@2.6.1
   +-- errno@0.1.4
   | `-- prr@0.0.0
   +-- graceful-fs@4.1.3
   +-- image-size@0.4.0
   +-- mime@1.3.4
   +-- mkdirp@0.5.1
   | `-- minimist@0.0.8
   +-- promise@7.1.1
   | `-- asap@2.0.3
   +-- request@2.69.0
   | +-- aws-sign2@0.6.0
   | +-- aws4@1.3.2
   | | `-- lru-cache@4.0.0
   | |   +-- pseudomap@1.0.2
   | |   `-- yallist@2.0.0
   | +-- bl@1.0.3
   | | `-- readable-stream@2.0.6
   | |   +-- core-util-is@1.0.2
   | |   +-- inherits@2.0.1
   | |   +-- isarray@1.0.0
   | |   +-- process-nextick-args@1.0.6
   | |   +-- string_decoder@0.10.31
   | |   `-- util-deprecate@1.0.2
   | +-- caseless@0.11.0
   | +-- combined-stream@1.0.5
   | | `-- delayed-stream@1.0.0
   | +-- extend@3.0.0
   | +-- forever-agent@0.6.1
   | +-- form-data@1.0.0-rc4
   | | `-- async@1.5.2
   | +-- har-validator@2.0.6
   | | +-- chalk@1.1.1
   | | | +-- ansi-styles@2.2.0
   | | | | `-- color-convert@1.0.0
   | | | +-- escape-string-regexp@1.0.5
   | | | +-- has-ansi@2.0.0
   | | | | `-- ansi-regex@2.0.0
   | | | +-- strip-ansi@3.0.1
   | | | `-- supports-color@2.0.0
   | | +-- commander@2.9.0
   | | | `-- graceful-readlink@1.0.1
   | | +-- is-my-json-valid@2.13.1
   | | | +-- generate-function@2.0.0
   | | | +-- generate-object-property@1.2.0
   | | | | `-- is-property@1.0.2
   | | | +-- jsonpointer@2.0.0
   | | | `-- xtend@4.0.1
   | | `-- pinkie-promise@2.0.0
   | |   `-- pinkie@2.0.4
   | +-- hawk@3.1.3
   | | +-- boom@2.10.1
   | | +-- cryptiles@2.0.5
   | | +-- hoek@2.16.3
   | | `-- sntp@1.0.9
   | +-- http-signature@1.1.1
   | | +-- assert-plus@0.2.0
   | | +-- jsprim@1.2.2
   | | | +-- extsprintf@1.0.2
   | | | +-- json-schema@0.2.2
   | | | `-- verror@1.3.6
   | | `-- sshpk@1.7.4
   | |   +-- asn1@0.2.3
   | |   +-- dashdash@1.13.0
   | |   | `-- assert-plus@1.0.0
   | |   +-- ecc-jsbn@0.1.1
   | |   +-- jodid25519@1.0.2
   | |   +-- jsbn@0.1.0
   | |   `-- tweetnacl@0.14.1
   | +-- is-typedarray@1.0.0
   | +-- isstream@0.1.2
   | +-- json-stringify-safe@5.0.1
   | +-- mime-types@2.1.10
   | | `-- mime-db@1.22.0
   | +-- node-uuid@1.4.7
   | +-- oauth-sign@0.8.1
   | +-- qs@6.0.2
   | +-- stringstream@0.0.5
   | +-- tough-cookie@2.2.2
   | `-- tunnel-agent@0.4.2
   `-- source-map@0.5.3
示例
以下是 LESS 的一个简单示例。
hello.htm
<!doctype html>
   <head>
      <link rel = "stylesheet" href = "style.css" type = "text/css" />
   </head>

   <body>
      <h1>Welcome to TutorialsPoint</h1>
      <h3>Hello!!!!!</h3>
   </body>
</html>
现在让我们创建一个与 CSS 非常相似的文件 style.less,唯一的区别是它将以 .less 扩展名保存。.html 和 .less 这两个文件都应在文件夹 nodejs 内创建。
style.less
@primarycolor: #FF7F50;
@color:#800080;
h1 {
   color: @primarycolor;
}

h3 {
   color: @color;
}
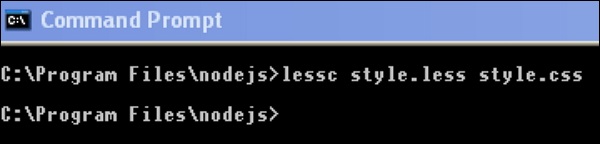
使用以下命令将 style.less 文件编译为 style.css −
lessc style.less style.css
运行上述命令时,它将自动创建 style.css 文件。每当您更改 LESS 文件时,都需要在 cmd 中运行上述命令,然后 style.css 文件将得到更新。
运行上述命令时,style.css 文件将包含以下代码 −
style.css
h1 {
    color: #FF7F50;
}

h3 {
    color: #800080;
}
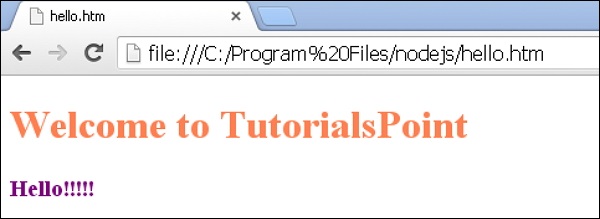
输出
现在让我们执行以下步骤来查看上述代码的工作原理 −
将上述 html 代码保存在 hello.htm 文件中。
在浏览器中打开此 HTML 文件,将显示以下输出。